Configuring and Connecting to a PostgreSQL Database with Docker
These articles are part of my learning journey through my graduate applied data science program at University Of Michigan, Datacamp, Coursera & LinkedIn etc.
This article is about configuration, creation & connection of PostgreSQL through docker. Although this article is very basic in nature, but can be useful for future reference when configuring, setting up and connecting to PostgreSQL database through docker container
This article includes:
- A brief introduction
- Step 1: Pull the Official PostgreSQL Image
- Step 2: Create and Run a PostgreSQL Container
- Step 3: Verify the Running Container
- Step 4: Connect to the PostgreSQL Database
- Step 5: Create a New Database
- Step 6: Connect to the Newly Created Database
- Step 7: Create a Table and Insert Data
- Conclusion
A brief introduction
Docker has revolutionized the way we deploy and manage applications, and databases are no exception. PostgreSQL, a powerful open-source relational database management system, can be easily set up and used with Docker. In this blog post, we’ll walk through the steps to configure and connect to a PostgreSQL database using Docker.
Step 1: Pull the Official PostgreSQL Image
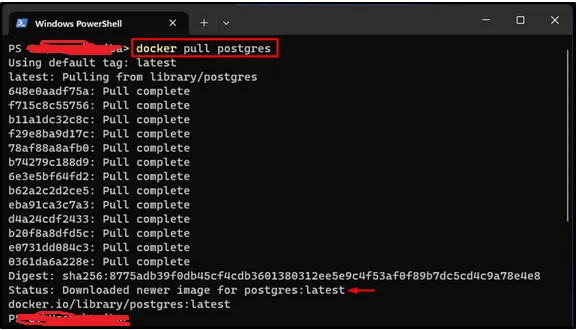
To get started, we need to pull the official PostgreSQL image from Docker Hub. Open your terminal or command prompt and run the following command:
docker pull postgresThis command will download the latest version of the PostgreSQL image to your local machine.
Step 2: Create and Run a PostgreSQL Container
Once the image is downloaded, we can create and run a PostgreSQL container using the following command:
docker run -d --name mypostgres -p 5432:5432 -e POSTGRES_PASSWORD=yourpassword postgresLet’s break down the command:
* -d: Runs the container in detached mode, allowing it to run in the background.
* --name mypostgres: Assigns a name to the container for easy reference.
* -p 5432:5432: Maps the container's port 5432 to the host's port 5432.
* -e POSTGRES_PASSWORD=yourpassword: Sets the password for the default postgres user.
* postgres: Specifies the image to use for creating the container.Step 3: Verify the Running Container
To ensure that the PostgreSQL container is running, use the following command:
docker psYou should see the mypostgres container listed in the output.
Step 4: Connect to the PostgreSQL Database
Now that our PostgreSQL container is up and running, let’s connect to the database. We can do this by executing the psql command inside the container:
docker exec -it mypostgres psql -U postgresThis command opens an interactive terminal inside the container and connects to the PostgreSQL database using the postgres user.
Execute the psql command along with the hostname and user name to make a connection with the Postgres Database Server:
psql -h localhost -U postgresStep 5: Create a New Database
Once connected to the PostgreSQL database, we can create a new database using the following SQL command:
CREATE DATABASE mydatabase;Replace mydatabase with your desired database name.
Before creating, just to display a list of all databases, use the command:
\lAs you can see, I have already created a sample database called “sample_employee”.
To exit the (END) prompt, use the following command:
qStep 6: Connect to the Newly Created Database
To connect to the newly created database, use the ommand followed by the database name:
\c mydatabaseYou are now connected to the mydatabase database and can start executing SQL queries and creating tables.
Step 7: Create a Table and Insert Data
Let’s create a simple table called users and insert some sample data:
CREATE TABLE users (
  id SERIAL PRIMARY KEY,
  name VARCHAR(50),
  email VARCHAR(100)
);

INSERT INTO users (name, email) VALUES ('John Doe', 'john@example.com');
INSERT INTO users (name, email) VALUES ('Jane Smith', 'jane@example.com');Step 8: Query the Data
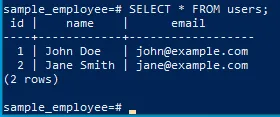
To verify that the data was inserted successfully, we can query the users table:
SELECT * FROM users;You should see the inserted records displayed in the output. Conclusion
In this basic article, we learned how to configure and connect to a PostgreSQL database using Docker. By leveraging Docker, we can easily set up a PostgreSQL environment without the need for local installation. We covered the steps to pull the PostgreSQL image, create and run a container, connect to the database, create a new database, and perform basic SQL operations. With this knowledge, you can start developing applications that utilize PostgreSQL as the database backend, all within the convenience of Docker containers.


